Shipping Label Print Connect Connector
Setup of the Shipping Label Print Connect Connector for direct ZPL label printing through BE-terna Printconnect.
Purpose
This page describes the setup of the Shipping Label Print Connect Connector. The connector links Shipping Labels with BE-terna Printconnect and enables direct ZPL label printing without routing through the browser’s local printer.
Prerequisites
- BE-terna Printconnect is installed and configured. For details, see Printconnect – Setup.
- A user account is available and registered in PrintNode.
- The Shipping Label Print Connect Connector app is installed in the target environment.
Recommended Sequence
- Make sure BE-terna Printconnect is fully configured.
- Open the Shipping Label Setup page.
- Configure the printer assignment per user and label type.
Setup Components
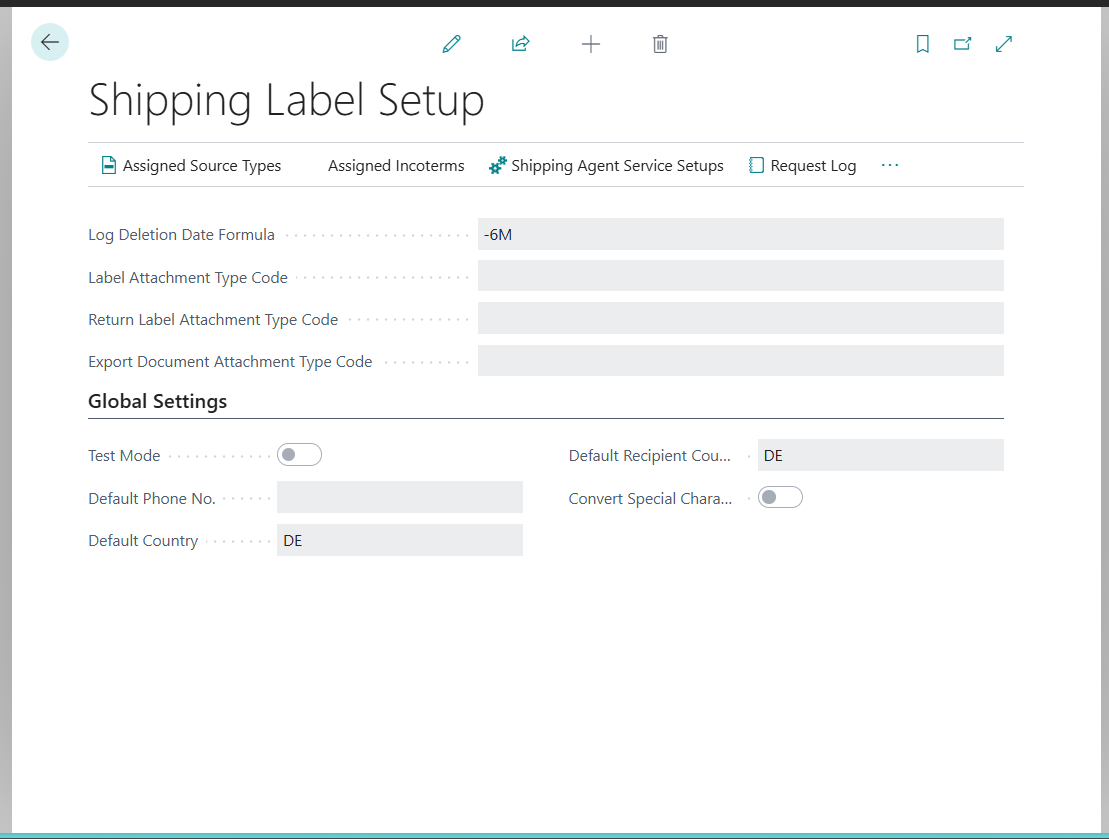
Open the Shipping Label Setup Page
In Business Central, open the Shipping Label Setup page.
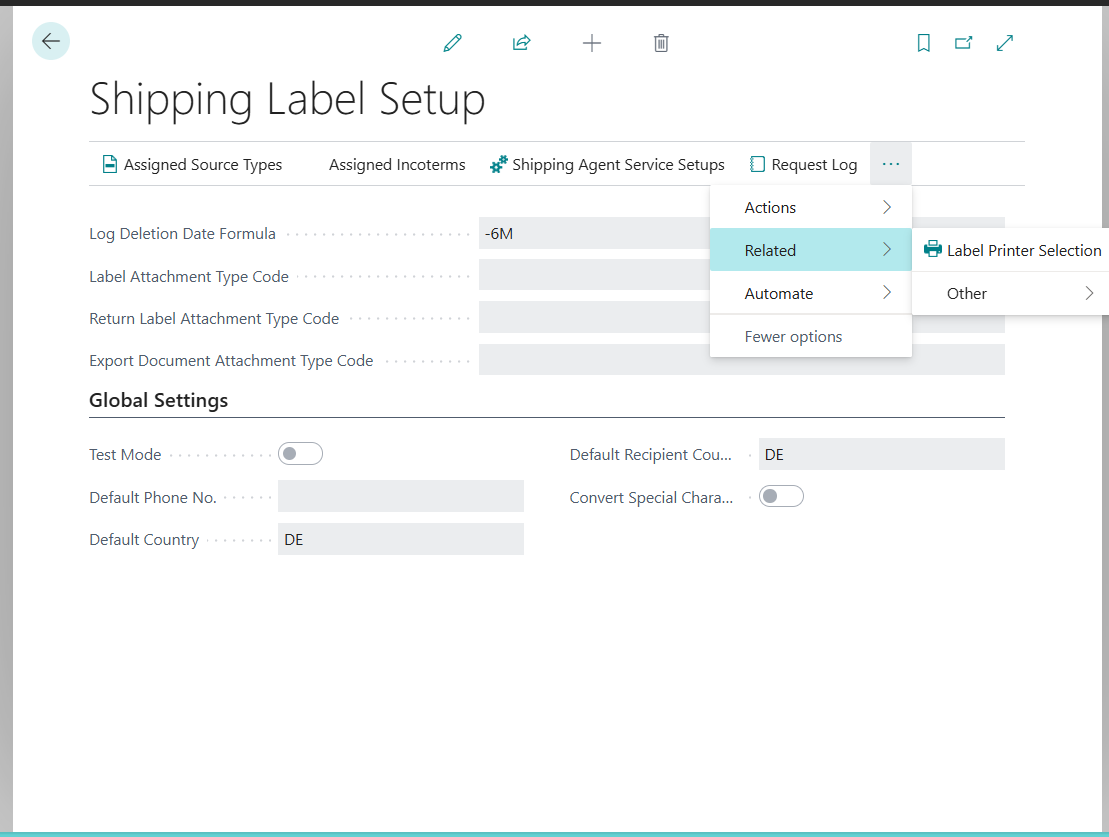
Open the Label Printer Selection
Navigate to the upper-right area and click the … (three dots) button. Select Related and then Label Printer Selection.
Configure the Printer
On the Label Printer Selection page, set the following fields:
- User: Select the user for whom the assignment should apply.
- Label Type: Select the required label type.
- Printer: Select a printer from the Printconnect printer list.
- Paper Format: Set the appropriate paper format.
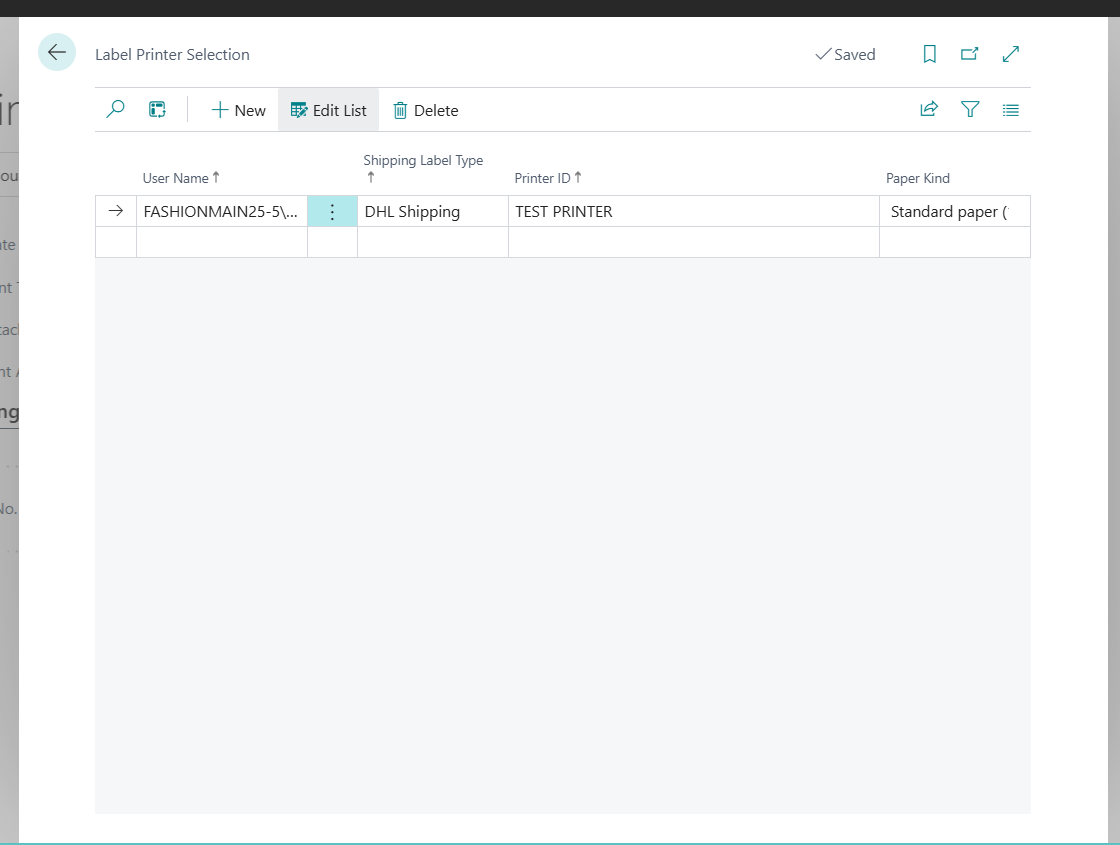
Once the assignment is saved, the Shipping Label Print Connect Connector is ready to use.