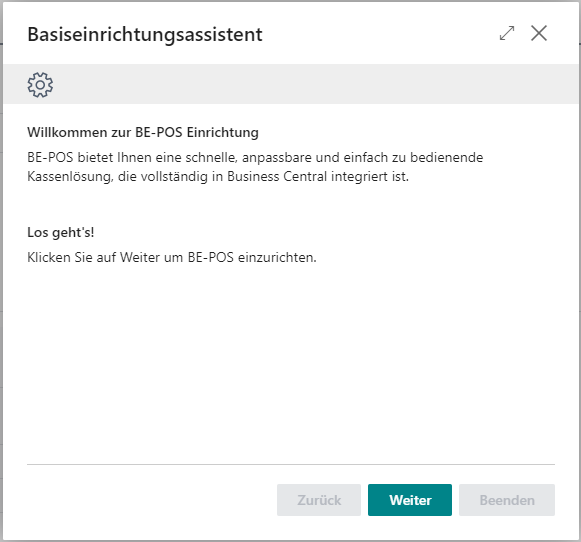
Basic Setup Wizard
As long as no cash register setups have been set up yet, this notification appears on all standard Business Central role centers and BE-POS setup pages:

If you click Set up BE-POS extension, the basic setup wizard opens. You can use it to define the initial setup for a cash register.
If you click Do not show again, this notification is no longer shown for the current user. If the current user has sufficient permissions to set up the cash register, the notification can also be deactivated for the entire tenant.
Insufficient Permissions
If you do not have sufficient permissions to set up the cash register, the basic setup wizard informs the user accordingly:
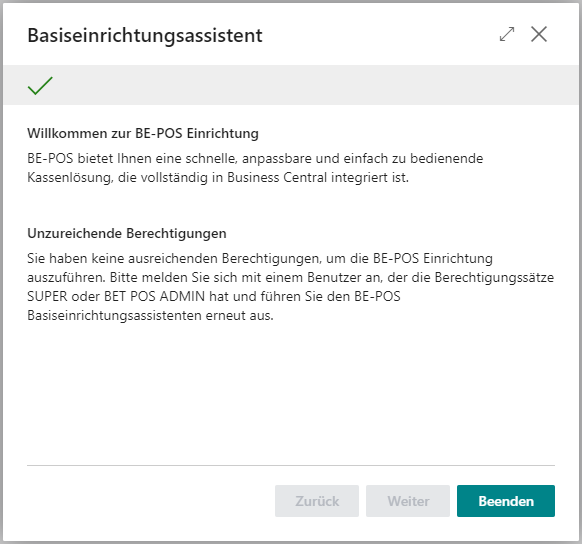
In this case, sign in with a user who has the SUPER or BET POS ADMIN permission set. Then run the basic setup wizard again with that user.
General Setup
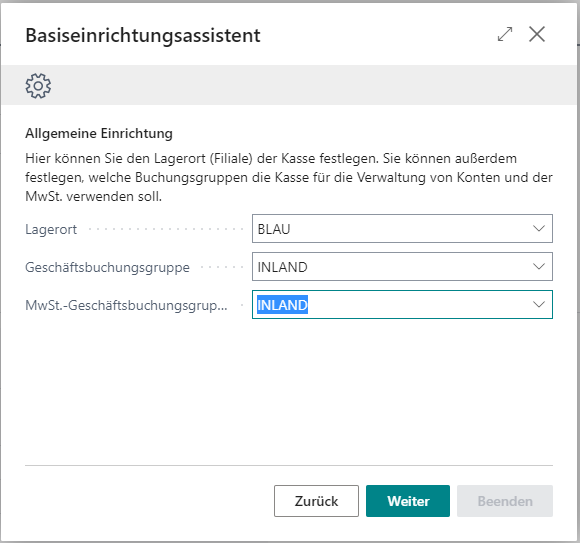
| Field | Description |
|---|---|
| Location | Specifies the location code where your items are sold |
| General Business Posting Group | Specifies a code for the company group |
| VAT Business Posting Group | Specifies a posting group code that determines how VAT is calculated and posted for customers and vendors |
Financial Setup
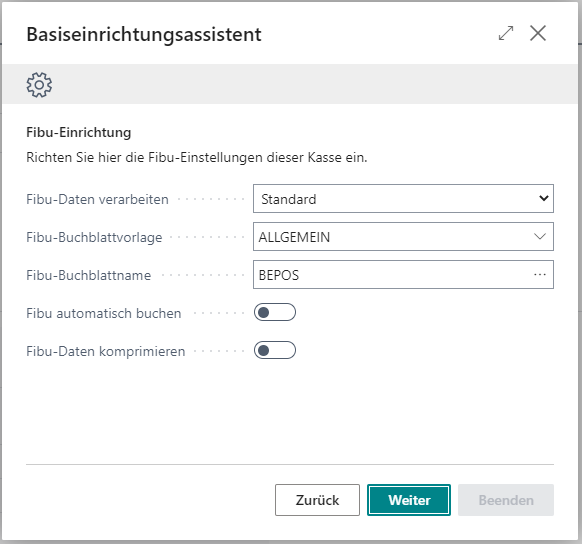
| Field | Description |
|---|---|
| Process Financial Data | Processes the financial data of each receipt either through standard finance or BE-POS journals |
| Financial Journal Template | Defines the name of the financial journal template for this cash register |
| Financial Journal Batch | Defines the financial journal batch for this cash register |
| Post Financial Data Automatically | Activates automatic financial posting |
| Compress Financial Data | Activates compression of financial data from revenue and discount lines |
Open Entries Posting Setup
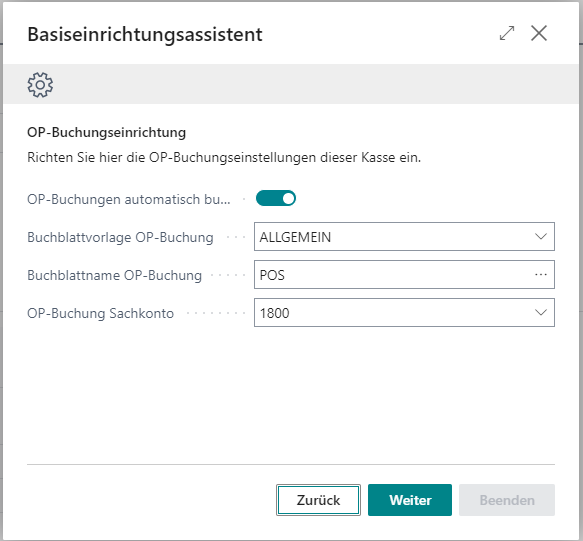
| Field | Description |
|---|---|
| Post Open Entries Automatically | Activates automatic posting of open entries |
| Open Entries Journal Template | Defines the name of the journal template for open entries for this cash register |
| Open Entries Journal Batch | Defines the journal batch for open entries for this cash register |
| Open Entries G/L Account | Specifies the account no. for open entries |
Item Posting Settings
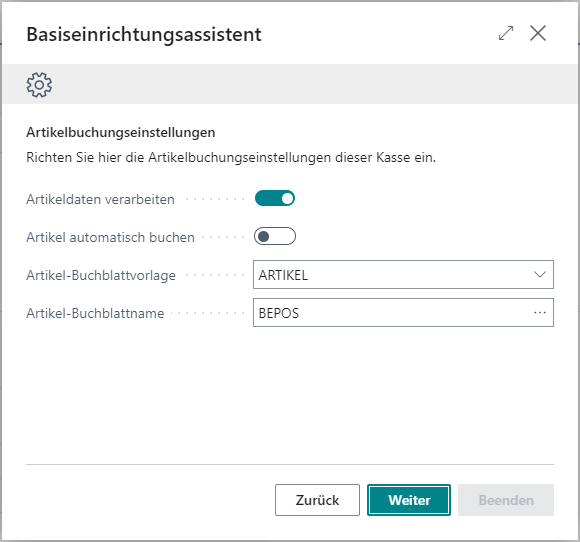
| Field | Description |
|---|---|
| Process Item Data | Defines whether item data from each receipt is to be processed |
| Post Items Automatically | Activates automatic item posting |
| Item Journal Template | Defines the name of the item journal template for this cash register |
| Item Journal Batch | Defines the item journal batch for this cash register |
Resource Posting Settings
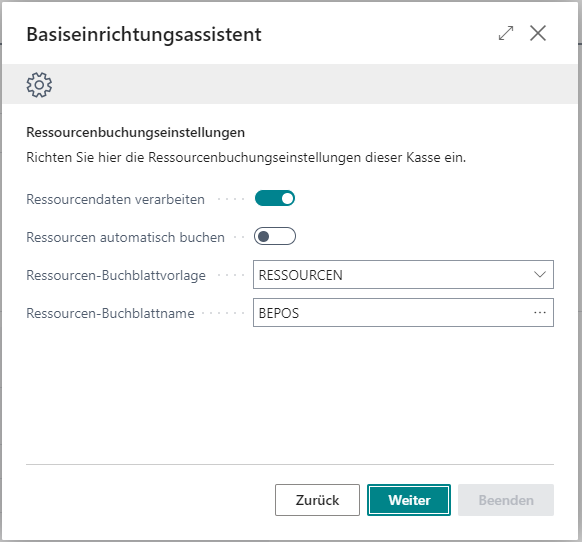
| Field | Description |
|---|---|
| Process Resource Data | Defines whether resource data from each receipt is to be processed |
| Post Resources Automatically | Activates automatic resource posting |
| Resource Journal Template | Defines the name of the resource journal template for this cash register |
| Resource Journal Batch | Defines the resource journal batch for this cash register |
Job Queue Setup
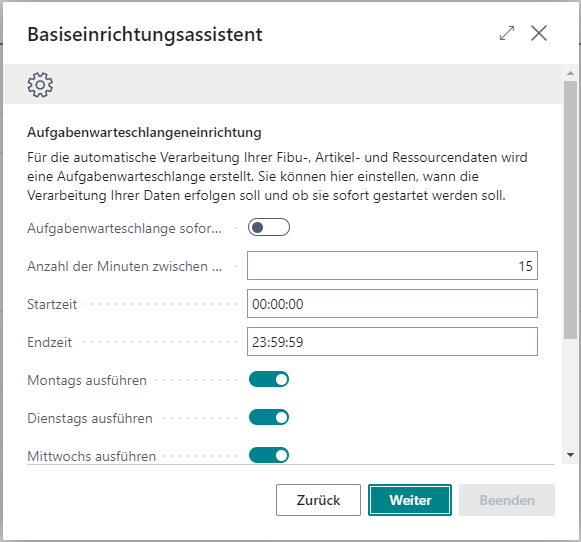
| Field | Description |
|---|---|
| Start Job Queue Immediately | Activate this setting if the job queue should start immediately |
| Number of Minutes Between Runs | Specifies the minimum number of minutes that must pass between job queue runs |
| Start Time | Specifies the earliest time when the job queue may run |
| End Time | Specifies the latest time when the job queue may run |
| Run on Mondays | Specifies that the job queue runs on Mondays |
| Run on Tuesdays | Specifies that the job queue runs on Tuesdays |
| Run on Wednesdays | Specifies that the job queue runs on Wednesdays |
| Run on Thursdays | Specifies that the job queue runs on Thursdays |
| Run on Fridays | Specifies that the job queue runs on Fridays |
| Run on Saturdays | Specifies that the job queue runs on Saturdays |
| Run on Sundays | Specifies that the job queue runs on Sundays |
Summary
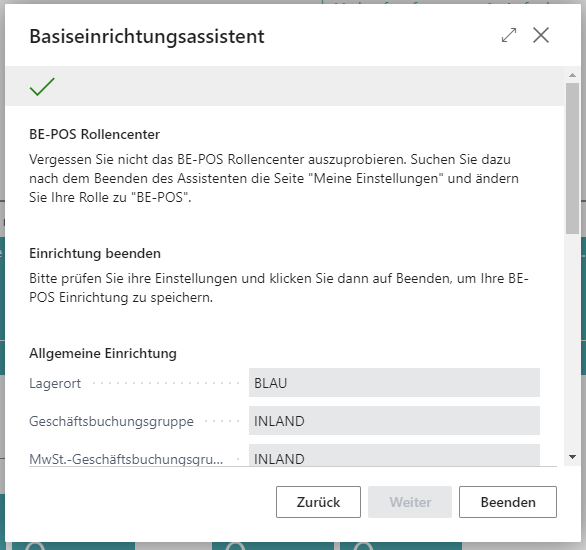
On the last page of the basic setup wizard, you can review the settings. Then click Finish to complete the setup and automatically create a cash register setup. After that, the BE-POS role center should be opened so that detailed settings can be maintained more quickly. To do this, change the Role to BE-POS on the My Settings page.