Setup
Purpose
This page describes the initial technical and functional setup of BE-terna Printconnect. First, you prepare PrintNode in the user context. Then, you connect Business Central with the printers that should be available for print jobs.
Prerequisites
- BE-terna Printconnect is installed and enabled in the target system.
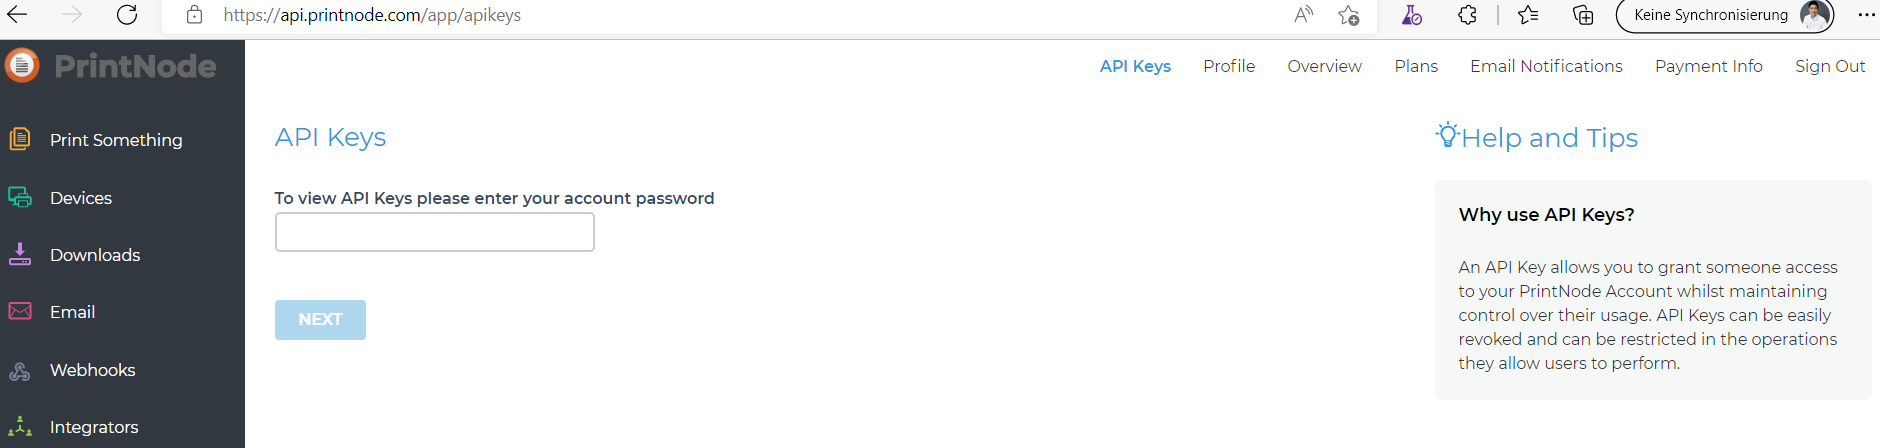
- The user has access to the PrintNode website and can generate an API key there.
- The PrintNode Client is installed on the workstation.
- For the initial setup, Business Central should not already contain conflicting local printer entries in printer management.
Recommended Sequence
- Create the PrintNode account, confirm the email address, and install the PrintNode Client.
- Retrieve the API key and API URL from PrintNode.
- Open the BE-terna Printconnect Setup page in Business Central and enter the connection details.
- Select the required printers and verify the first synchronization in printer management.
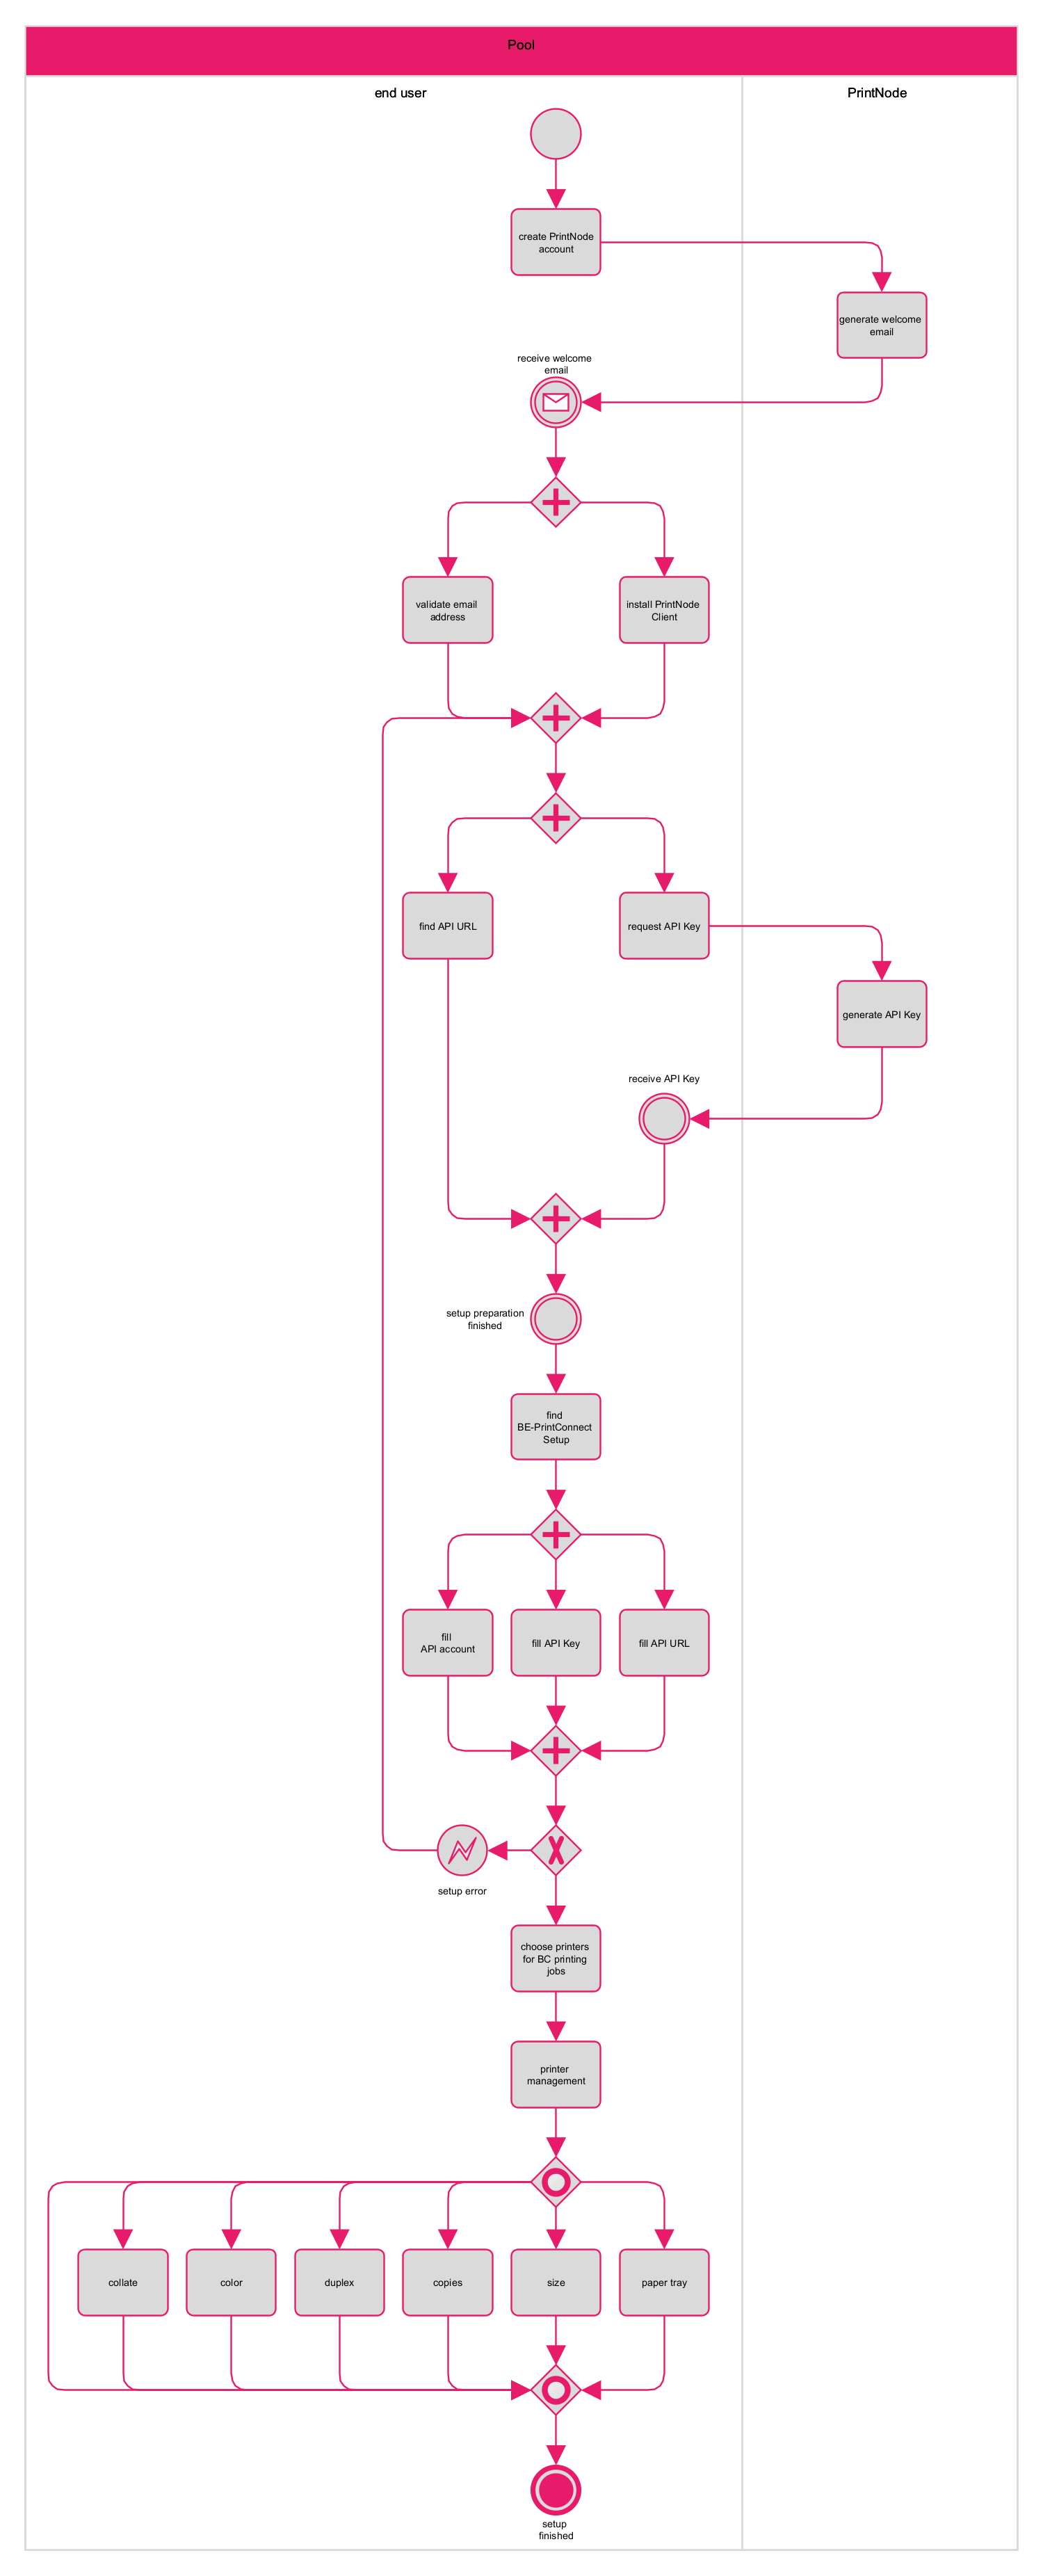
Setup Building Blocks
Prepare PrintNode
Printconnect depends on a working PrintNode user. After registration, confirm the email address and install the PrintNode Client on the workstation that should send the print jobs.
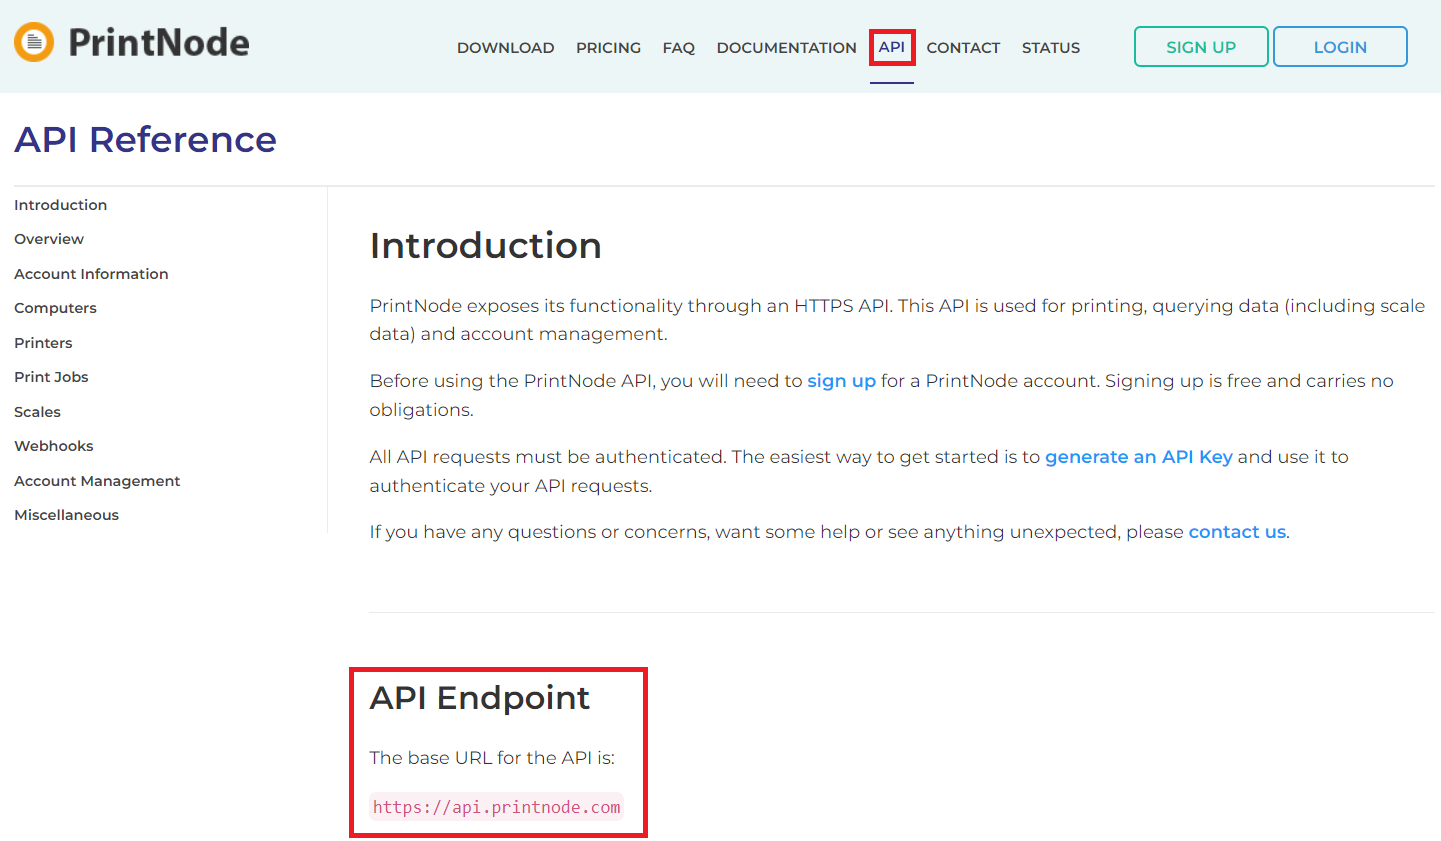
Then generate an API key in PrintNode and note the API URL that will be used in Business Central.
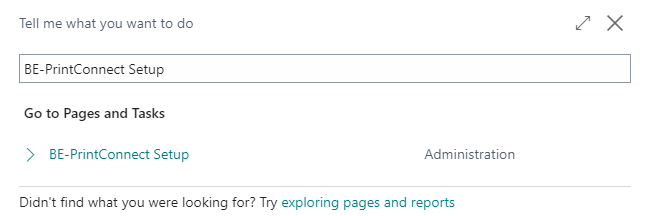
Open the BE-terna Printconnect Setup page
Search for BE-terna Printconnect Setup in Business Central and open the setup page for the user or target system.
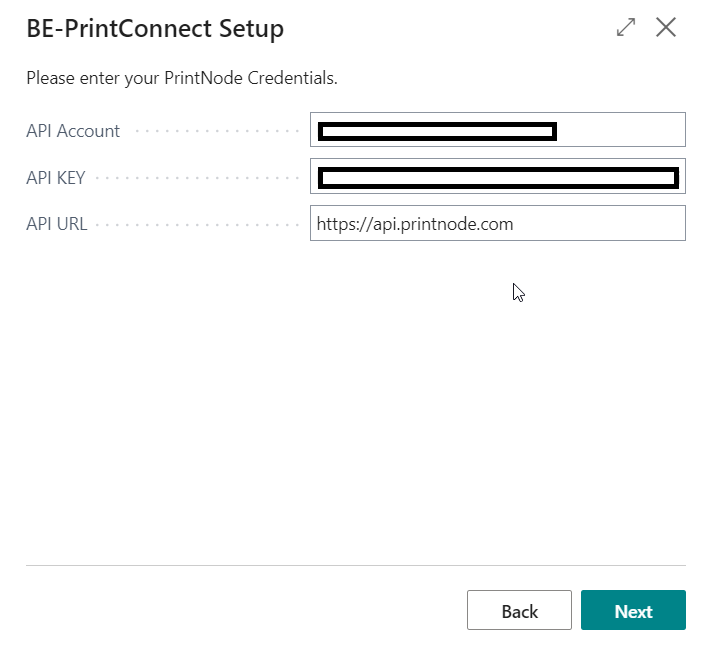
Connect Business Central with PrintNode
Enter the API Account, API Key, and API URL. Save the connection only after you confirm that all values belong to the same PrintNode account.
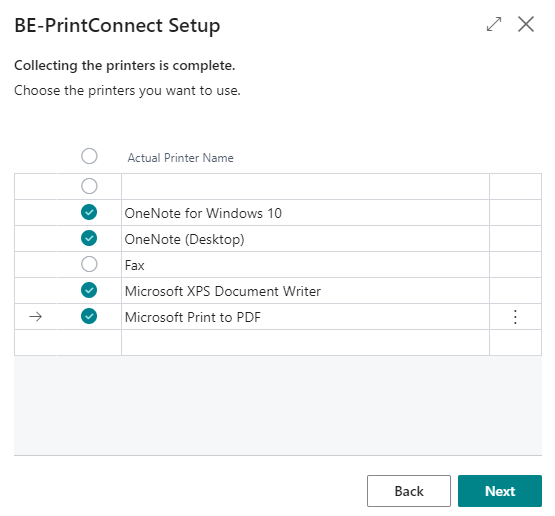
Select printers and verify the first synchronization
After the connection is established, Printconnect reads the printers that are available to the user. Select only the printers that should be used productively for Business Central print jobs.
Afterward, open the individual printer from printer management when printer-specific options such as color, duplex, copies, or size must be maintained. For recurring reports or document types, define the default printers and report assignments in Administration.
If a printer uses special formats or printer-specific paper codes, maintain the paper assignment per printer after the first synchronization in Administration.
Process Initial setup notes These points help avoid typical rollout issues during the first setup.
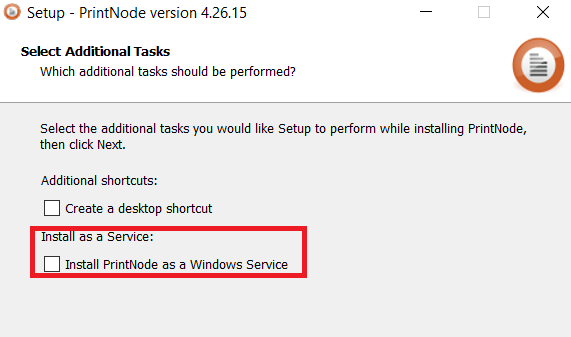
- Do not choose Install as a Service when installing the PrintNode Client if user printers should be detected in the normal user context.
- Always use the API account, API key, and API URL from the same PrintNode account.
- Use unique names in Actual Printer Name when local or similarly named printers exist.
- For non-standard paper formats, maintain the printer’s paper assignment directly after the first synchronization before you run productive print jobs with special sizes.
- Only during the initial setup, if the setup collides with existing local printers in Business Central and no productive Printconnect data must be retained, you can remove the extension together with its data and start the setup again. Warning: This permanently deletes existing Printconnect configuration and history. If the environment has already been used beyond first-time setup, back up the relevant data first or contact support before removing extension data.
Links