Registration
Purpose
On the Time Registration page, workers sign in, view their worker task list, and record starting and ending times for released operations. The data is stored as time registration entries and then transferred into the output journal.
Open Time Registration and Sign In
- In the worker role center, open Time Registration.
- In the sign-in dialog, choose the required sign-in method:
- PIN or
- Number and Password.
- Depending on the selected method, enter the PIN or worker number and password.
- Confirm with OK.
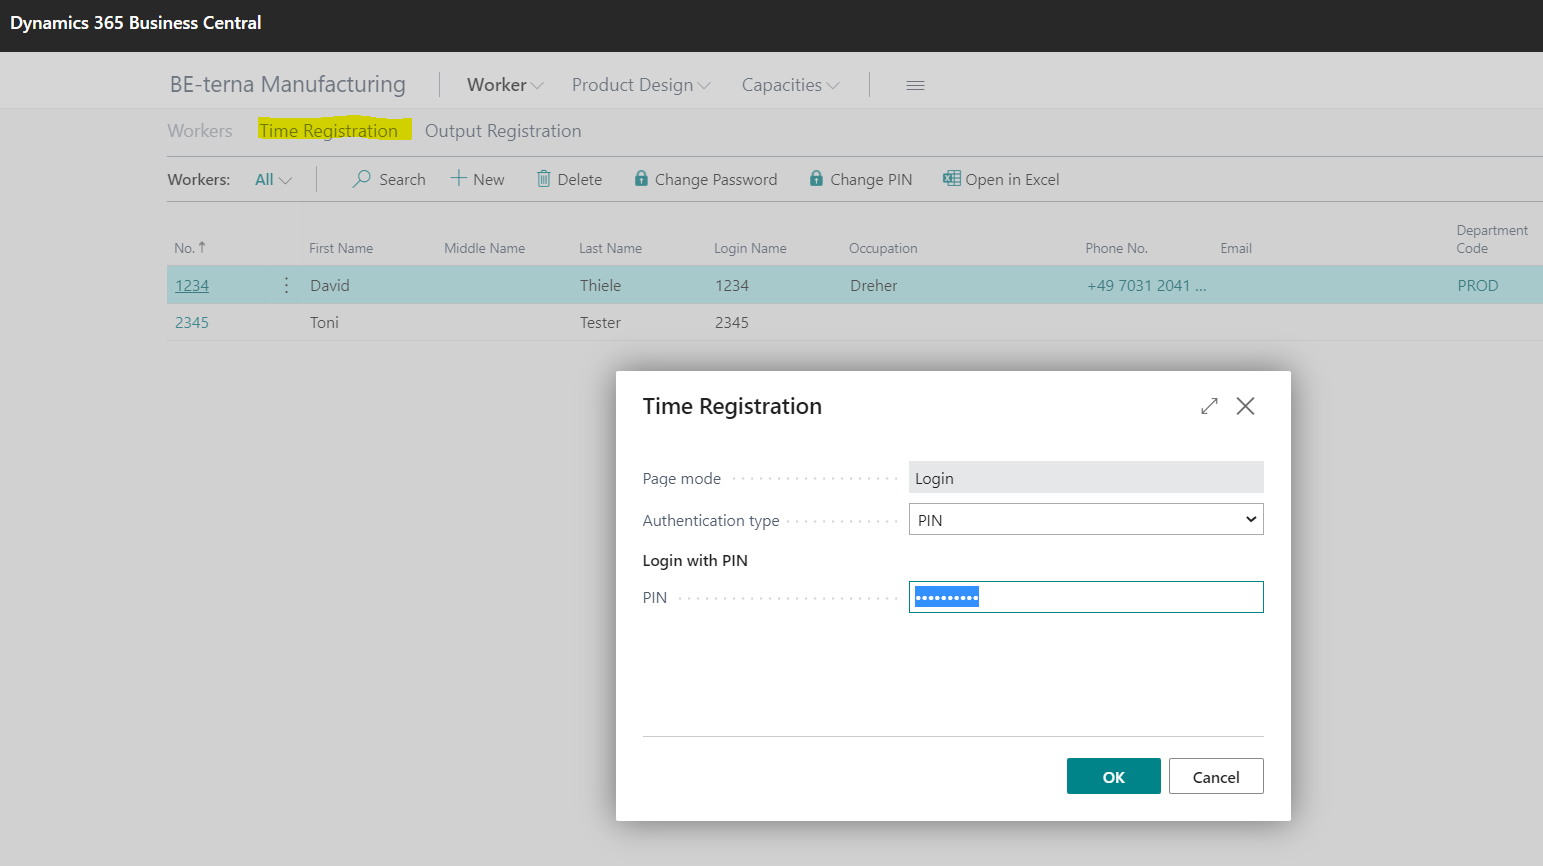
The Time Registration page opens.
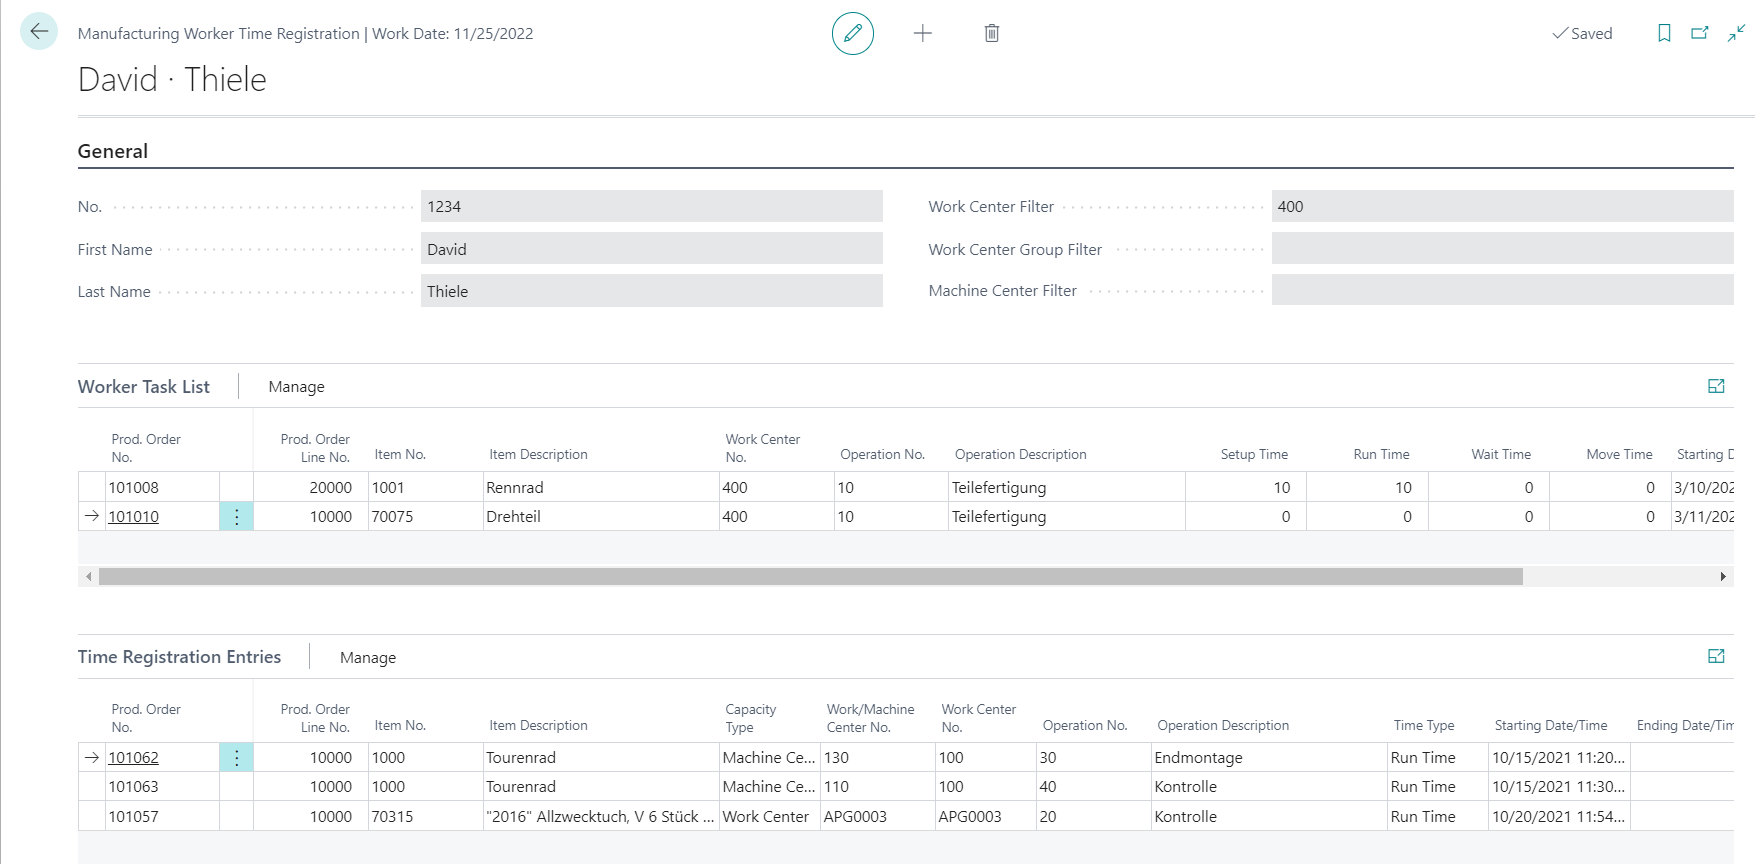
In the header, the page shows the signed-in worker and the worker filters. Below the header, two line areas are shown:
- Worker Task List with released production order operations.
- Time Registration Entries with started or prepared time registration entries.
Understand Shown Operations
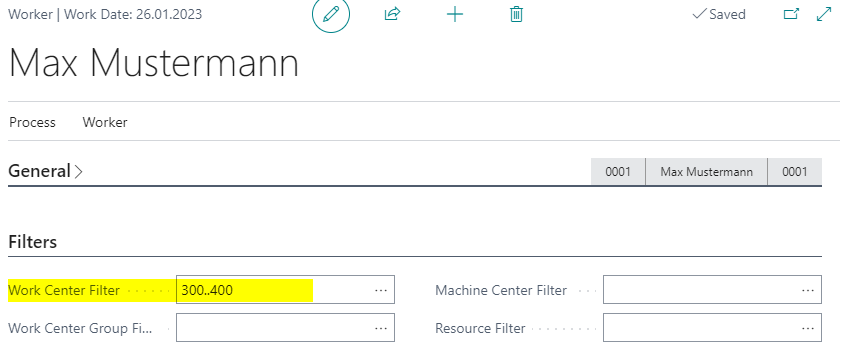
The worker task list shows operations from production orders with status Released. If filters are maintained on the worker master record, the operations are also filtered by Department, Work Center Group, and/or Work Center.
The preset filters from the worker master record can be changed manually on the Time Registration page. To make those deviations visible, a manually changed filter is displayed in red.
Standard filter from the worker:
View on the Time Registration page:

Manually changed filter:

Start an Operation
- In Worker Task List, select an operation line.
- Depending on the activity, select Start Setup or Start Run.
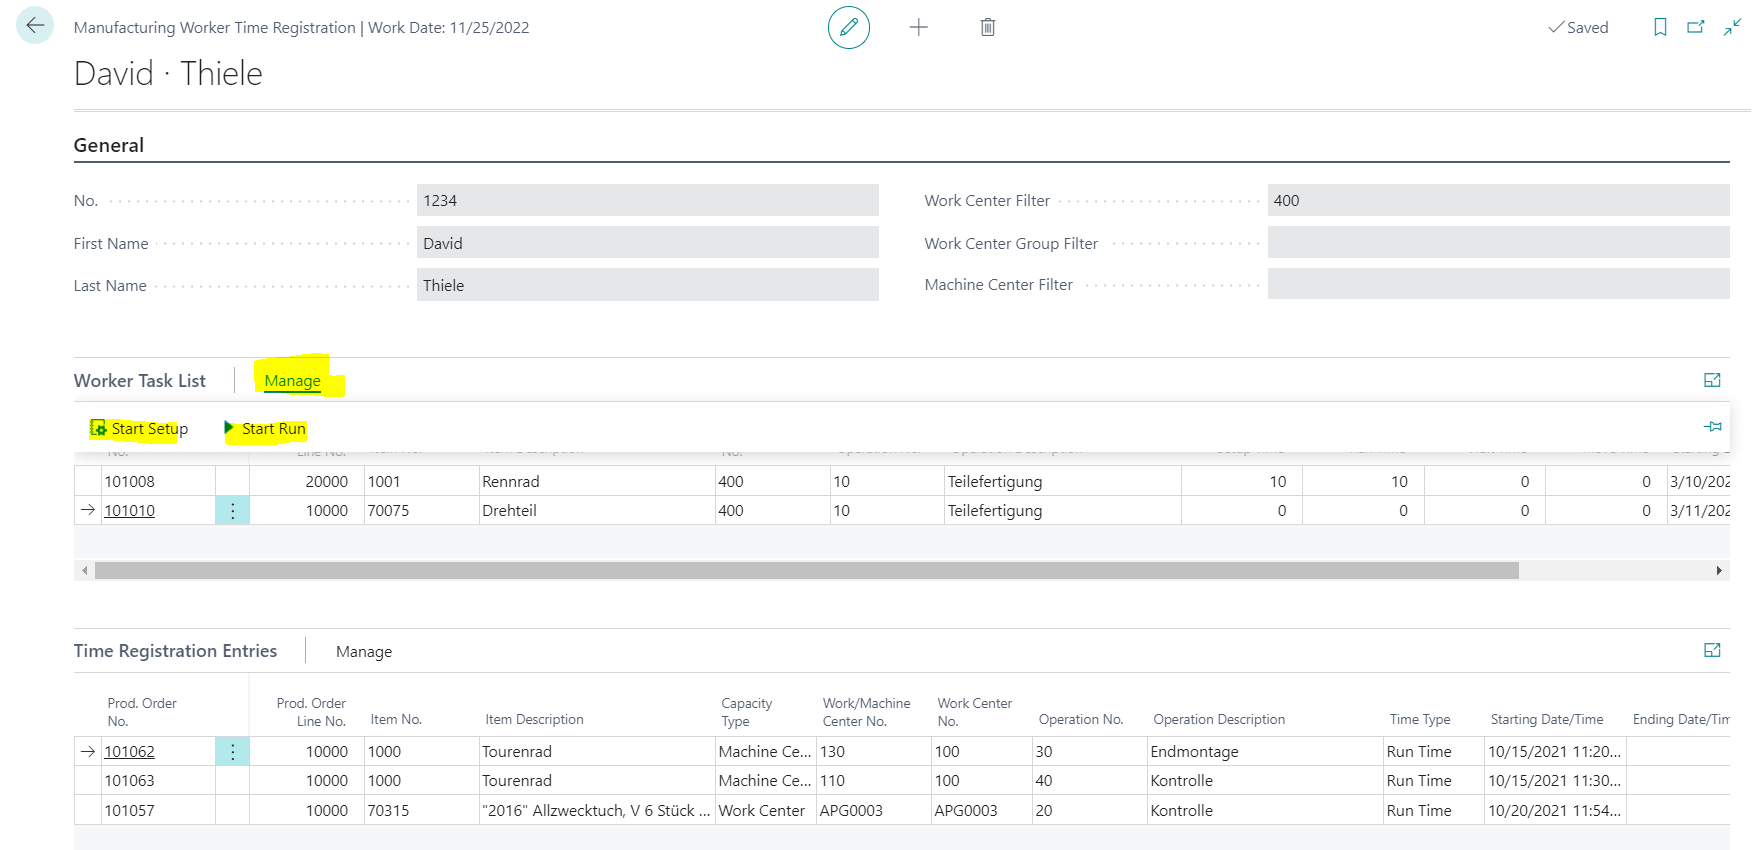
After the start, the operation is transferred into Time Registration Entries. Starting date and starting time are filled with the current time.
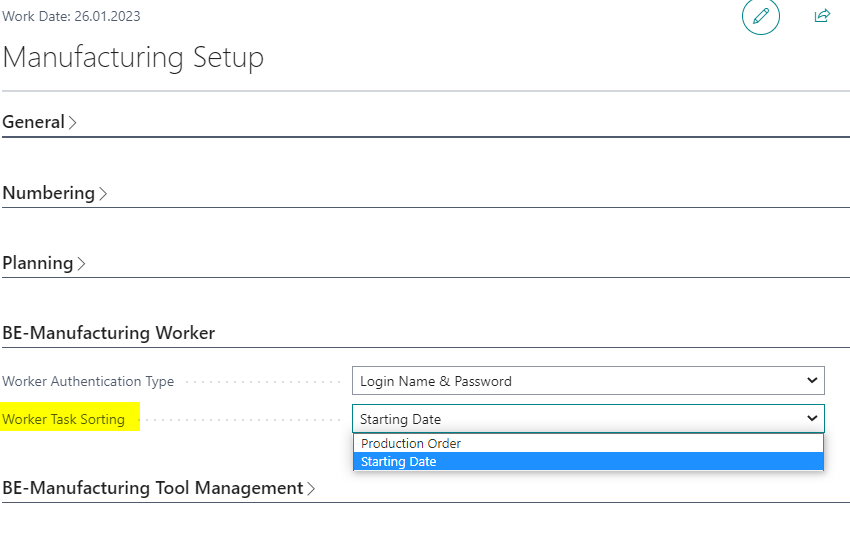
By default, entries are sorted by production order number. They can also be sorted by starting time. This setting is maintained in Manufacturing Setup through Worker Task Sorting.
Process Time Registration Entries
In Time Registration Entries, started operations can be processed further:
- stop time,
- undo stop time,
- cancel time registration,
- correct starting or ending time,
- change output location and/or bin,
- maintain item tracking,
- transfer the time registration into the output journal.
Stop Time
- Select the time registration entry.
- Select Stop Time.
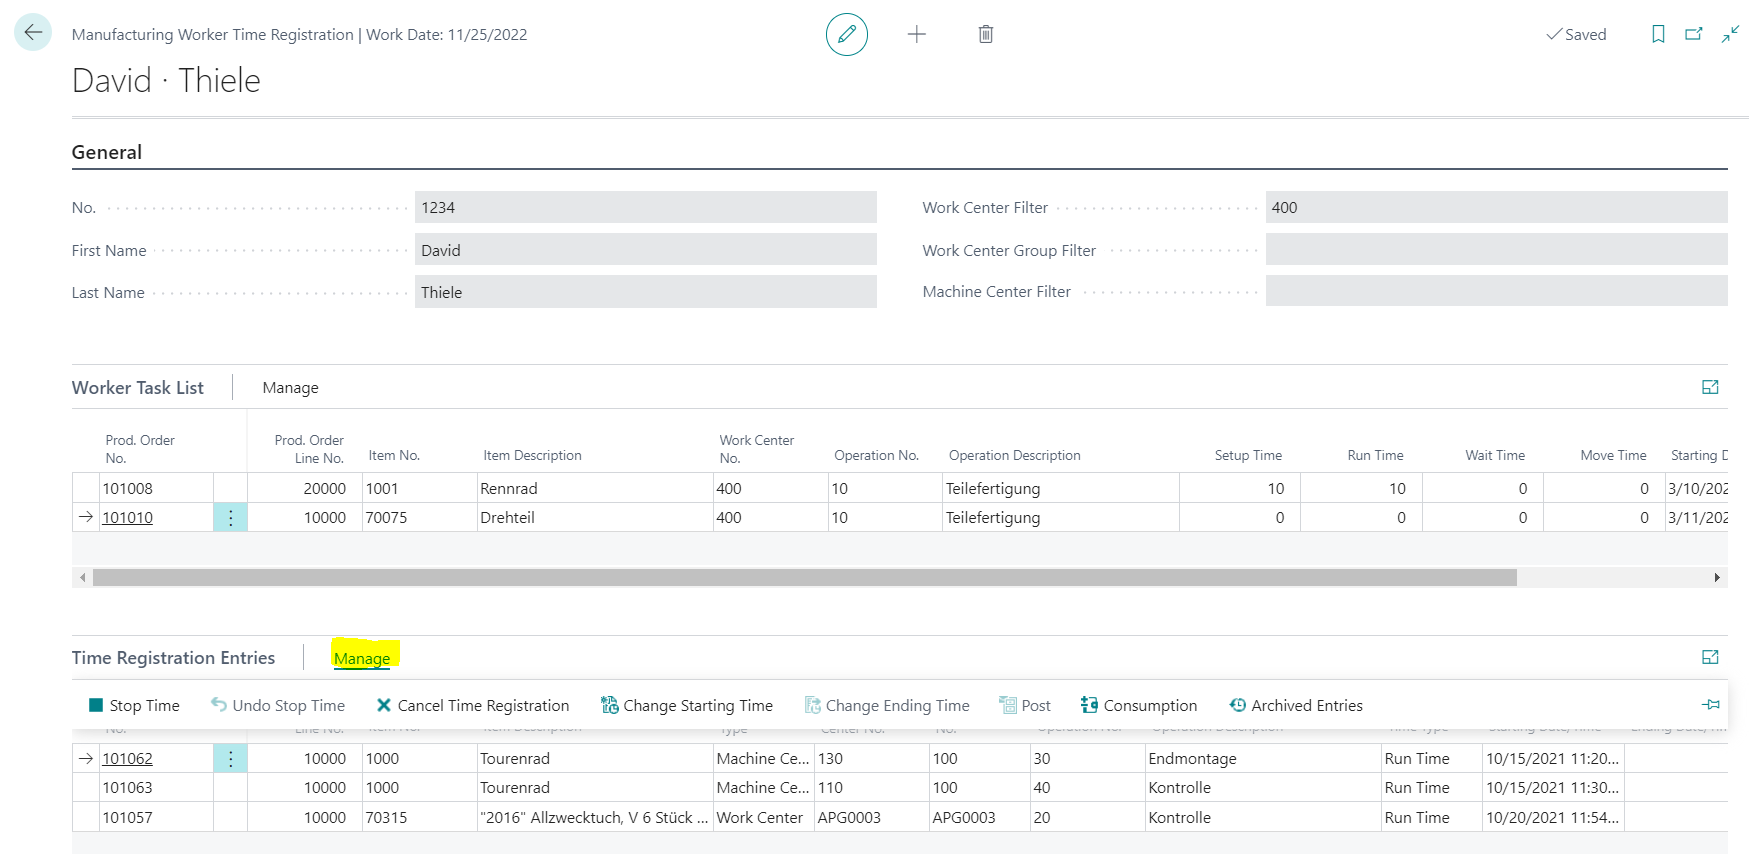
This fills ending date and ending time in the selected entry.
If you stopped the wrong entry, select the entry and choose Undo Stop Time. This removes ending date and ending time again.
Cancel Time Registration
If the wrong operation was registered, the complete time registration for the selected operation can be canceled.
- Select the time registration entry.
- Select Cancel Time Registration.
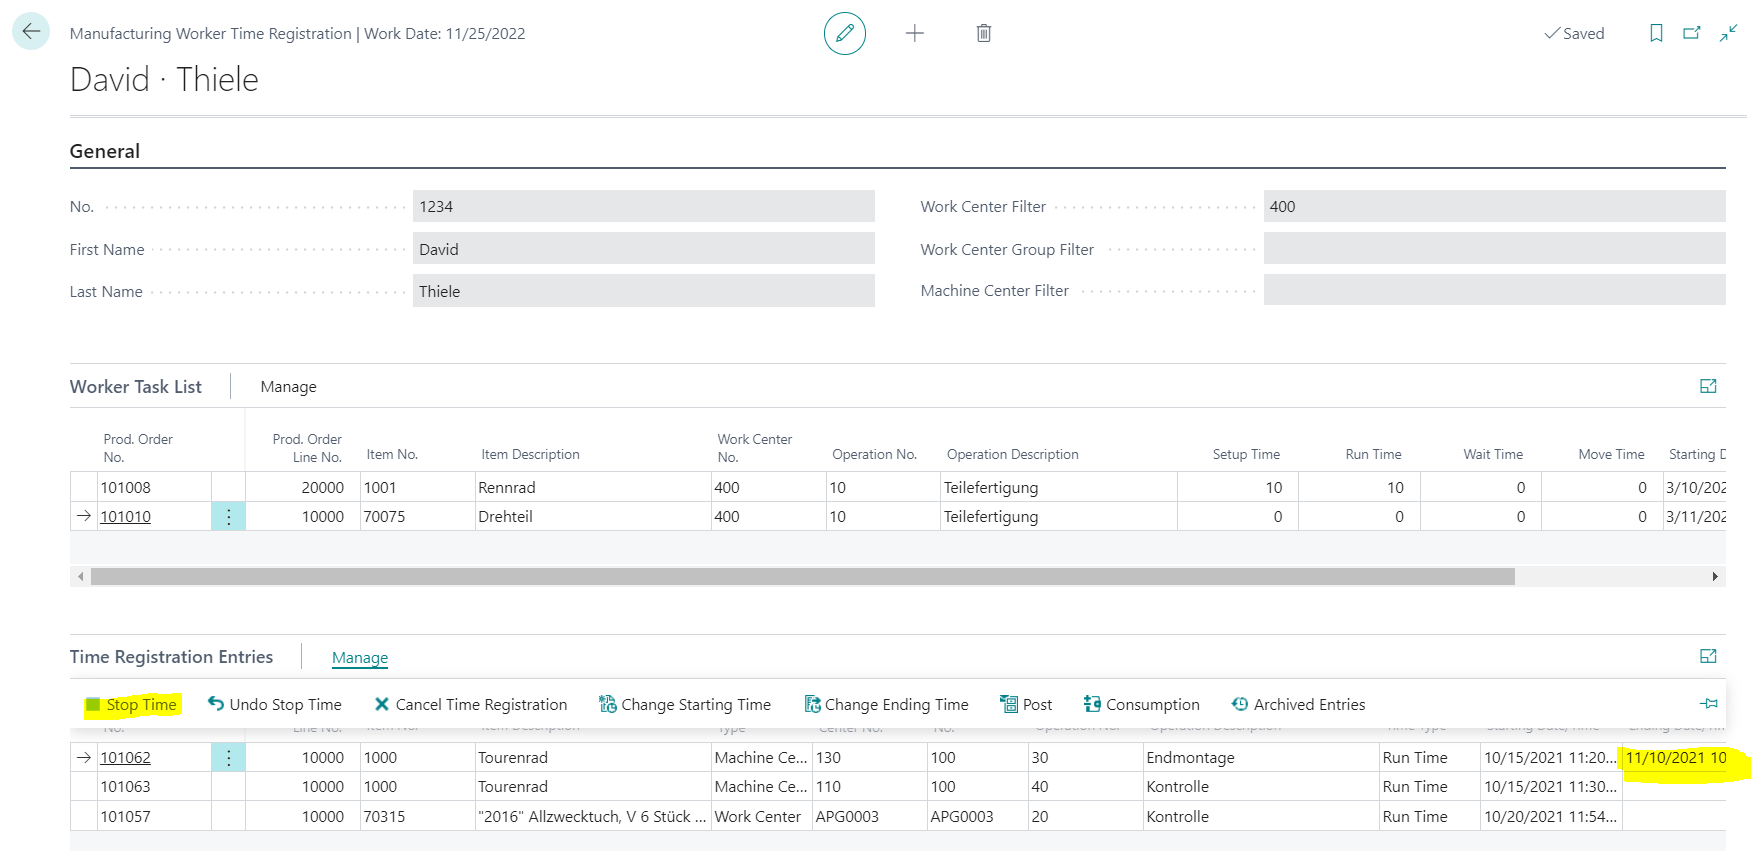
The selected time registration entries are deleted without posting.
Correct Times
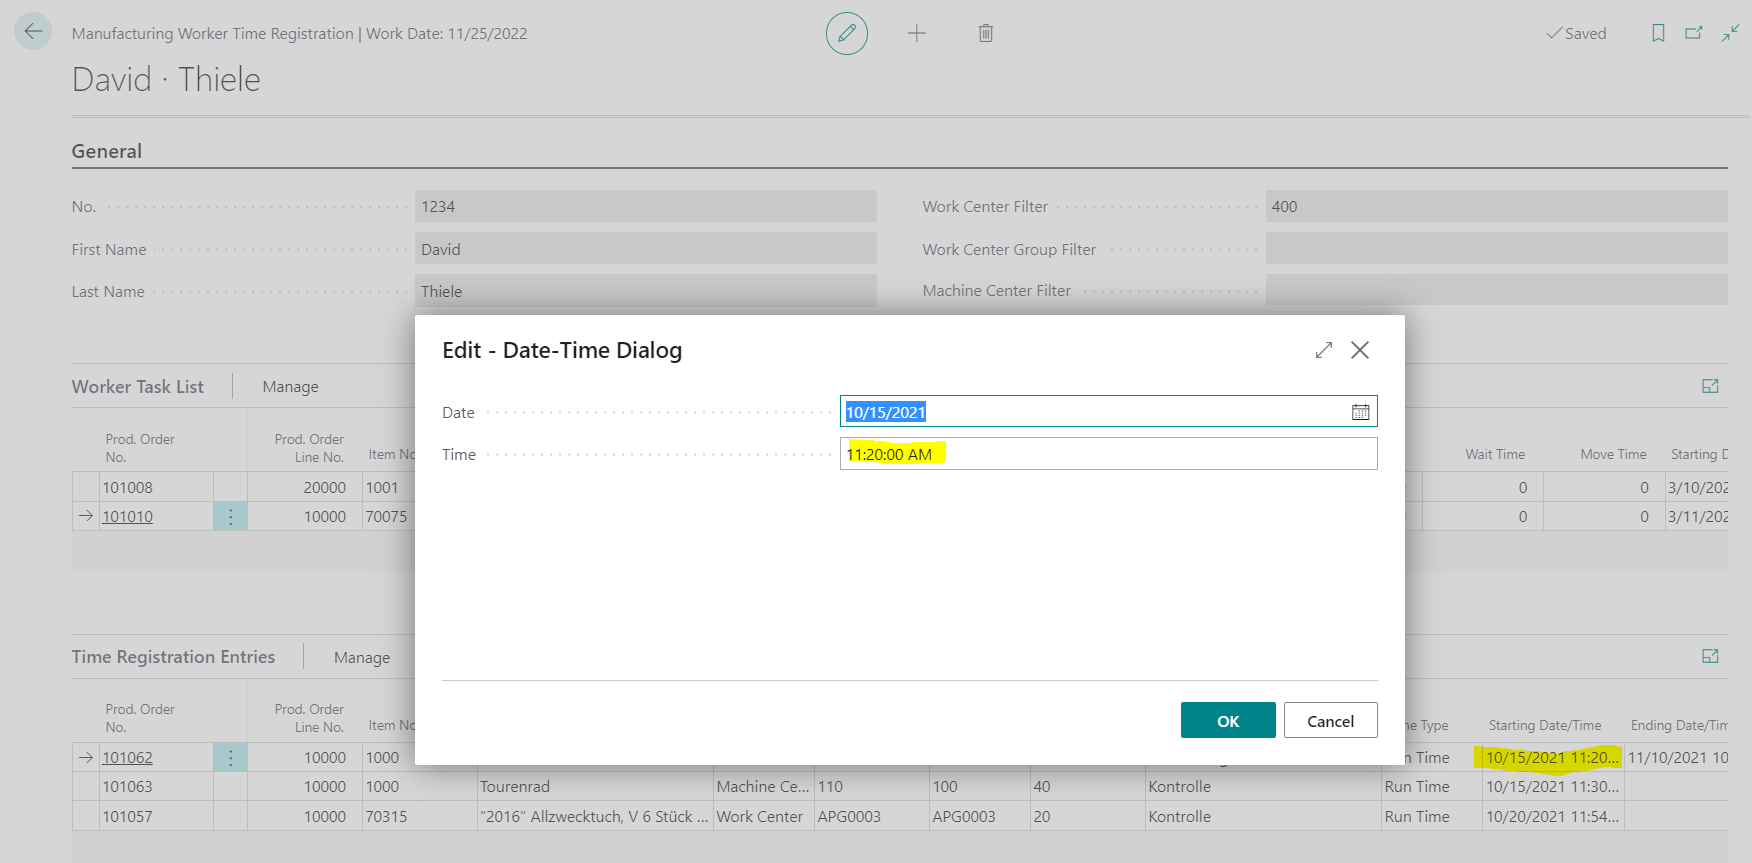
If starting time or ending time was recorded incorrectly, it can be corrected. This is useful, for example, if a worker forgot to sign in or stop the registration at the right time.
- Select the time registration entry.
- Select the action for changing start time or end time.
- Change date and time.
- Confirm with OK.
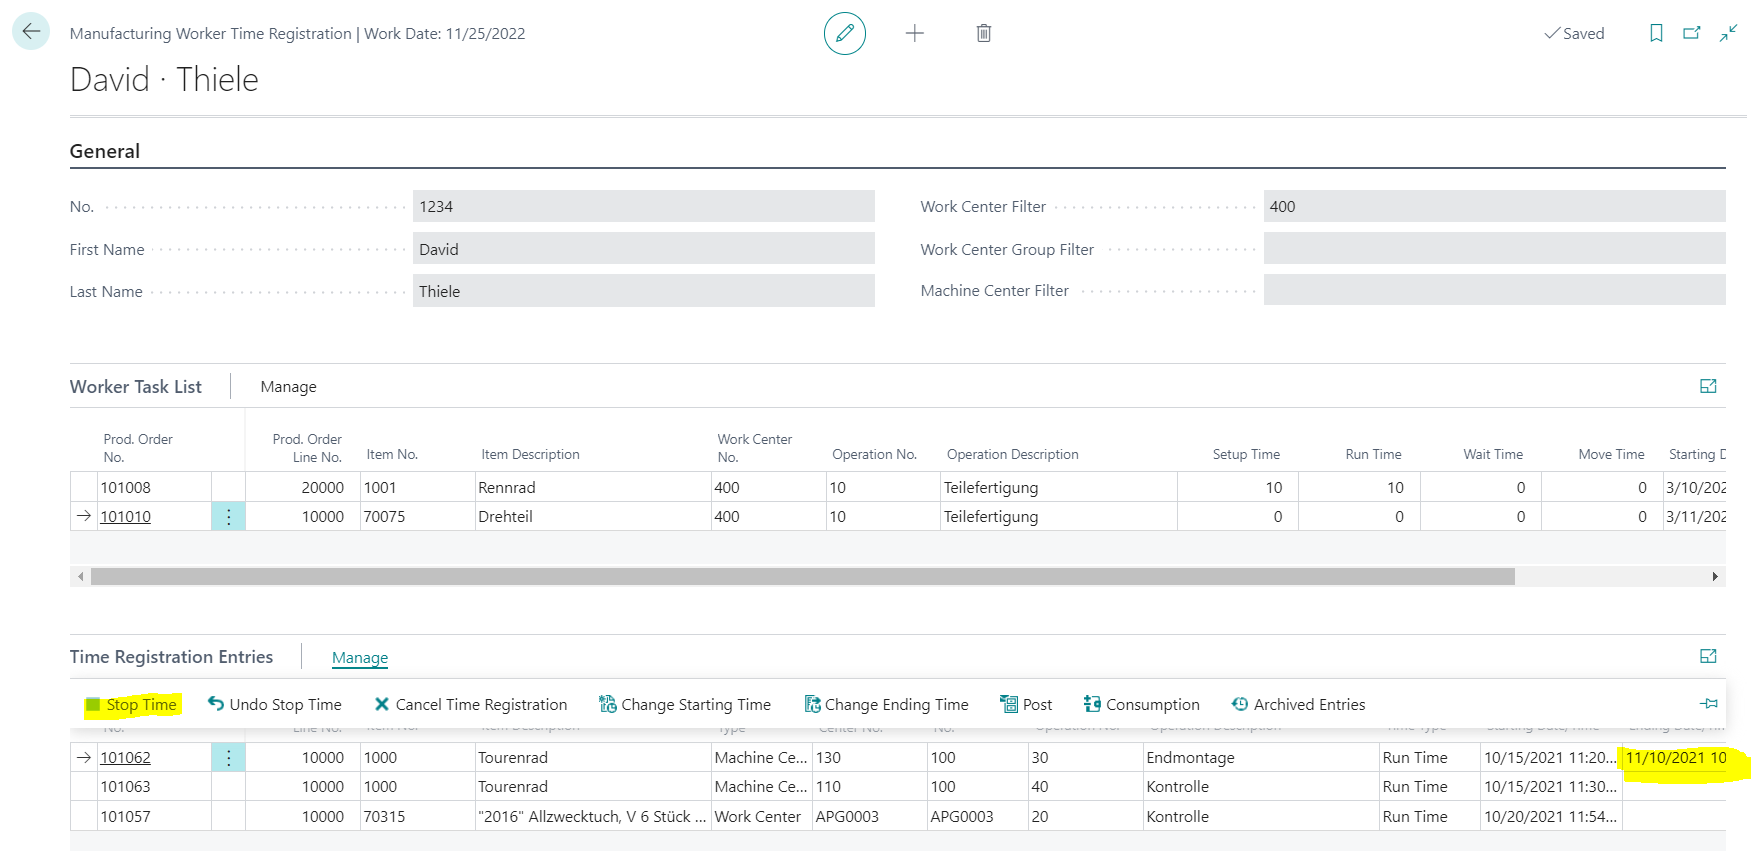
Alternatively, you can manually change the required time in Quantity. This adjusts the ending time accordingly.
Change Location and Bin
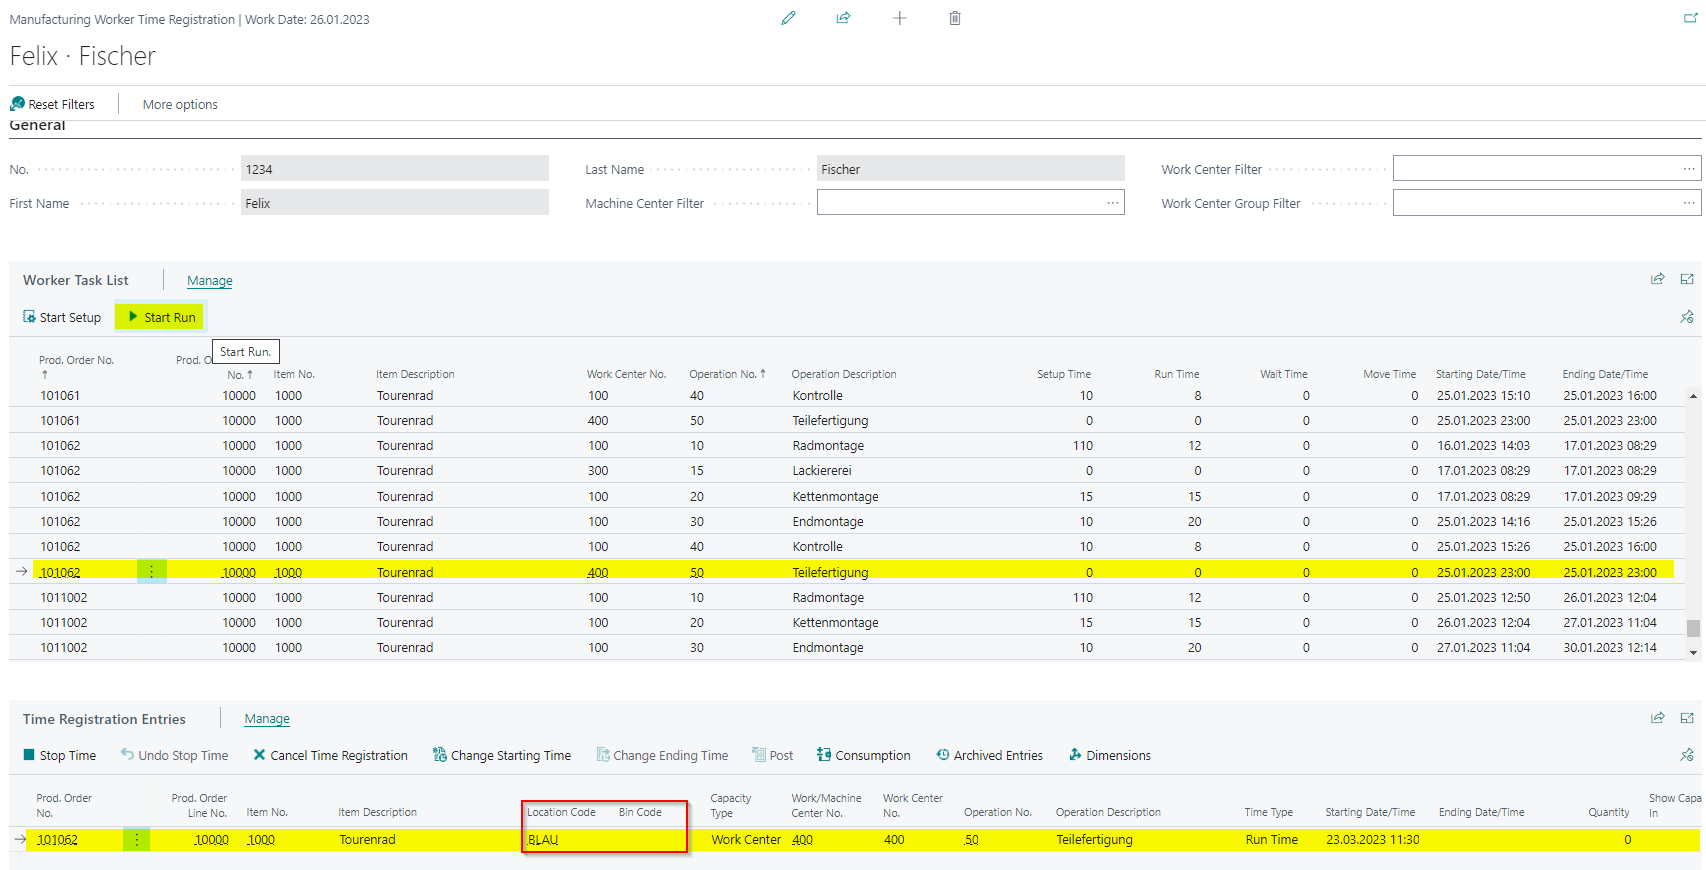
For later output reporting, location and bin can be changed.
Maintain Item Tracking
If a tracked item is produced, item tracking must be entered and posted when the Finished Quantity is posted on the last operation. The data flows follow the production journal behavior in Business Central.
BE-terna Manufacturing supports the following logic:
- If item tracking is maintained on the production order line, it is copied to the new time registration entry when the last operation is started. This makes predefined serial numbers or lot numbers available.
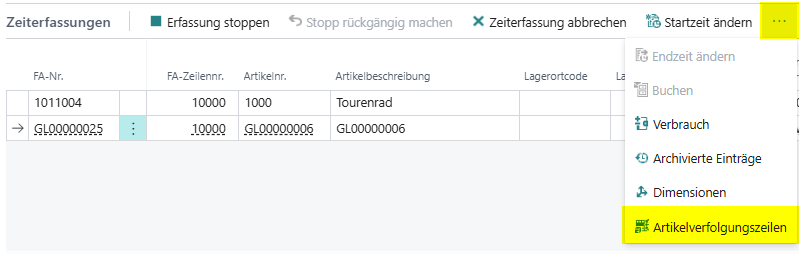
- Use Item Tracking Lines to open the tracking assignment from the time registration entry.
- The item tracking can be adjusted. This may be required if only a partial quantity is reported as finished and the original item tracking would over-define the quantity.
- When the item tracking lines are closed, the item tracking assigned to the time registration entry is corrected.
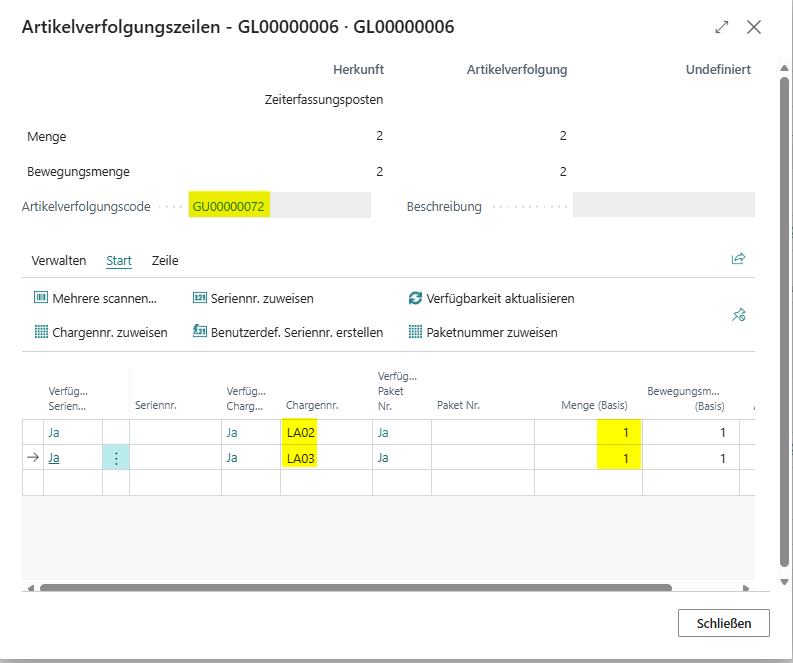
During posting, Business Central checks consistency between Finished Quantity and assigned item tracking. If an error is found, the time registration entry cannot be posted and an error message is shown. Posting creates one or more item ledger entries with the maintained tracking information.
If the time registration is canceled during this process, entered tracking information can be lost.
Transfer Time
Before transfer, the worker can still add Location Code and Bin Code.
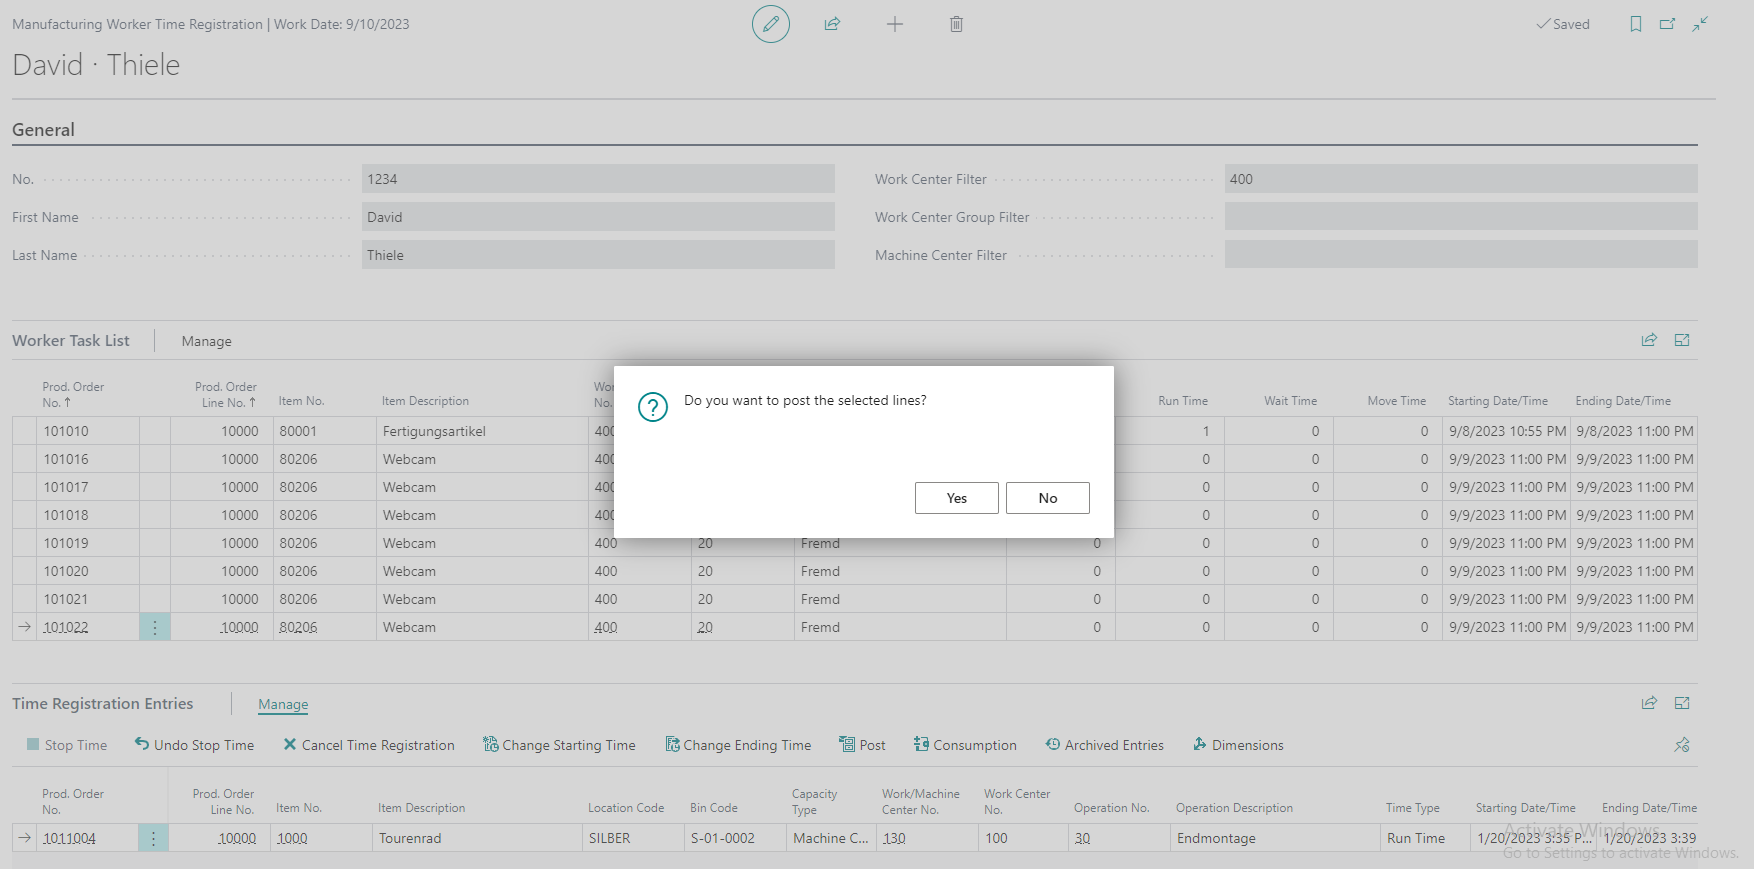
When the time registration is transferred, the entries are copied into the Output Journal. The transferred data includes date, production order number, operation, and the difference between ending time and starting time.
The function transfers the entry into the journal, but does not post it finally. The data should be reviewed in the journal and then posted, for example by a team leader or responsible role.
Sign Off
Close the Time Registration page to sign off the worker. Another worker can then sign in on the same device.
Result
After registration, starting time, ending time, quantity, and optional additional data are available as time registration entries. After transfer, they are ready for review and posting in the output journal.
Links